이번 글에서는 구글 로그인 api, 카카오 로그인 api에 이어서 네이버 로그인 api까지 성공적으로 api연동을 마치게 되어 네이번 로그인 api를 연동시키는 부분에 대해 정리해보고자 한다. (안드로이드 기준)
(네이버 로그인도 카카오 로그인과 마찬가지로 안드로이드 앱 빌드방식과 앱 빌드와 관련된 파일들에 대해 알지 못하는 무지한 상태에서 처음 API를 연동시키고 있었을 때 정말 많은 시간과 에너지가 갈리며 고통받았었던 API였는데, 프로젝트 x 교내활동 도중 네이버 현업 개발자 멘토분이 당시 다운받았던 네이버 로그인관련 라이브러리 자체가 제대로 빌드되지 않는 라이브러리라서, 다른 네아로 라이브러리를 끌어와야 할 것 같다는 피드백을 받아 다른 네아로 API 라이브러리를 끌어오게 되었는데 카카오 로그인 api와 마찬가지로 너무 간단하게 네아로 API를 구현하게되었다,,)
https://developers.naver.com/main/
NAVER Developers
네이버 오픈 API들을 활용해 개발자들이 다양한 애플리케이션을 개발할 수 있도록 API 가이드와 SDK를 제공합니다. 제공중인 오픈 API에는 네이버 로그인, 검색, 단축URL, 캡차를 비롯 기계번역, 음
developers.naver.com
1. Naver Developers 앱 등록
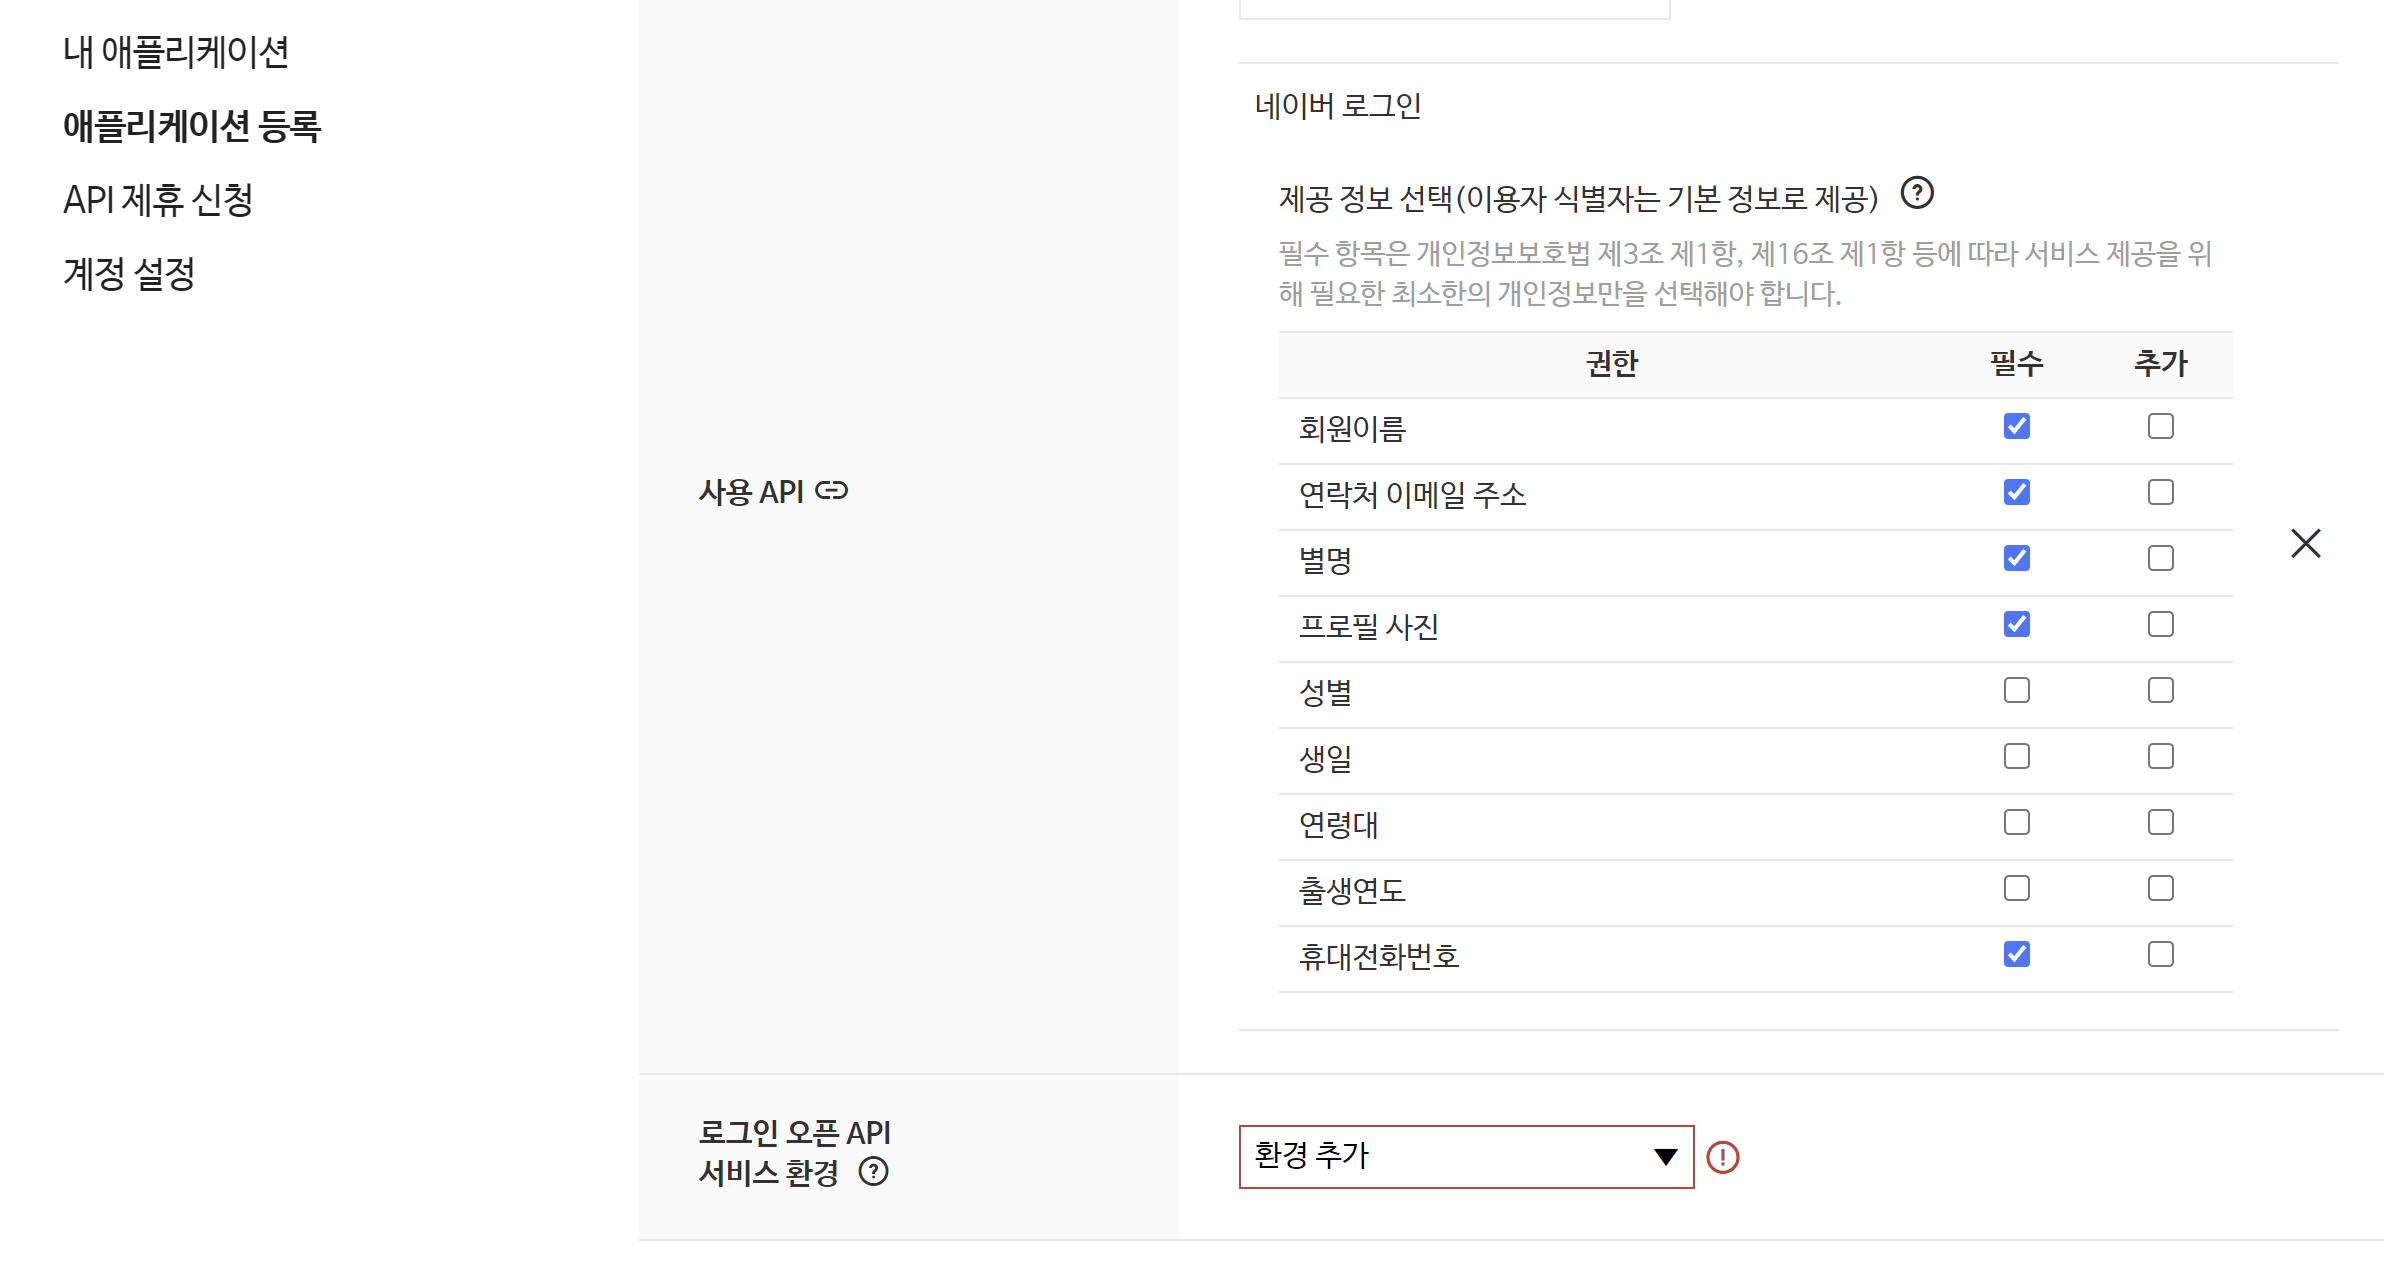
카카오 로그인 api를 연동시킬 때와 마찬가지로 위의 링크를 통해 Naver Developers에 본인 네이버 계정으로 로그인 한 다음, 'Application' - '애플리케이션 등록' 버튼을 눌러 '애플리케이션 이름'과 사용 API를 '네이버 로그인 API'로 지정해주고, 네이버 로그인시 불러오고 싶은 사용자 정보들을 체크해주도록 하자.


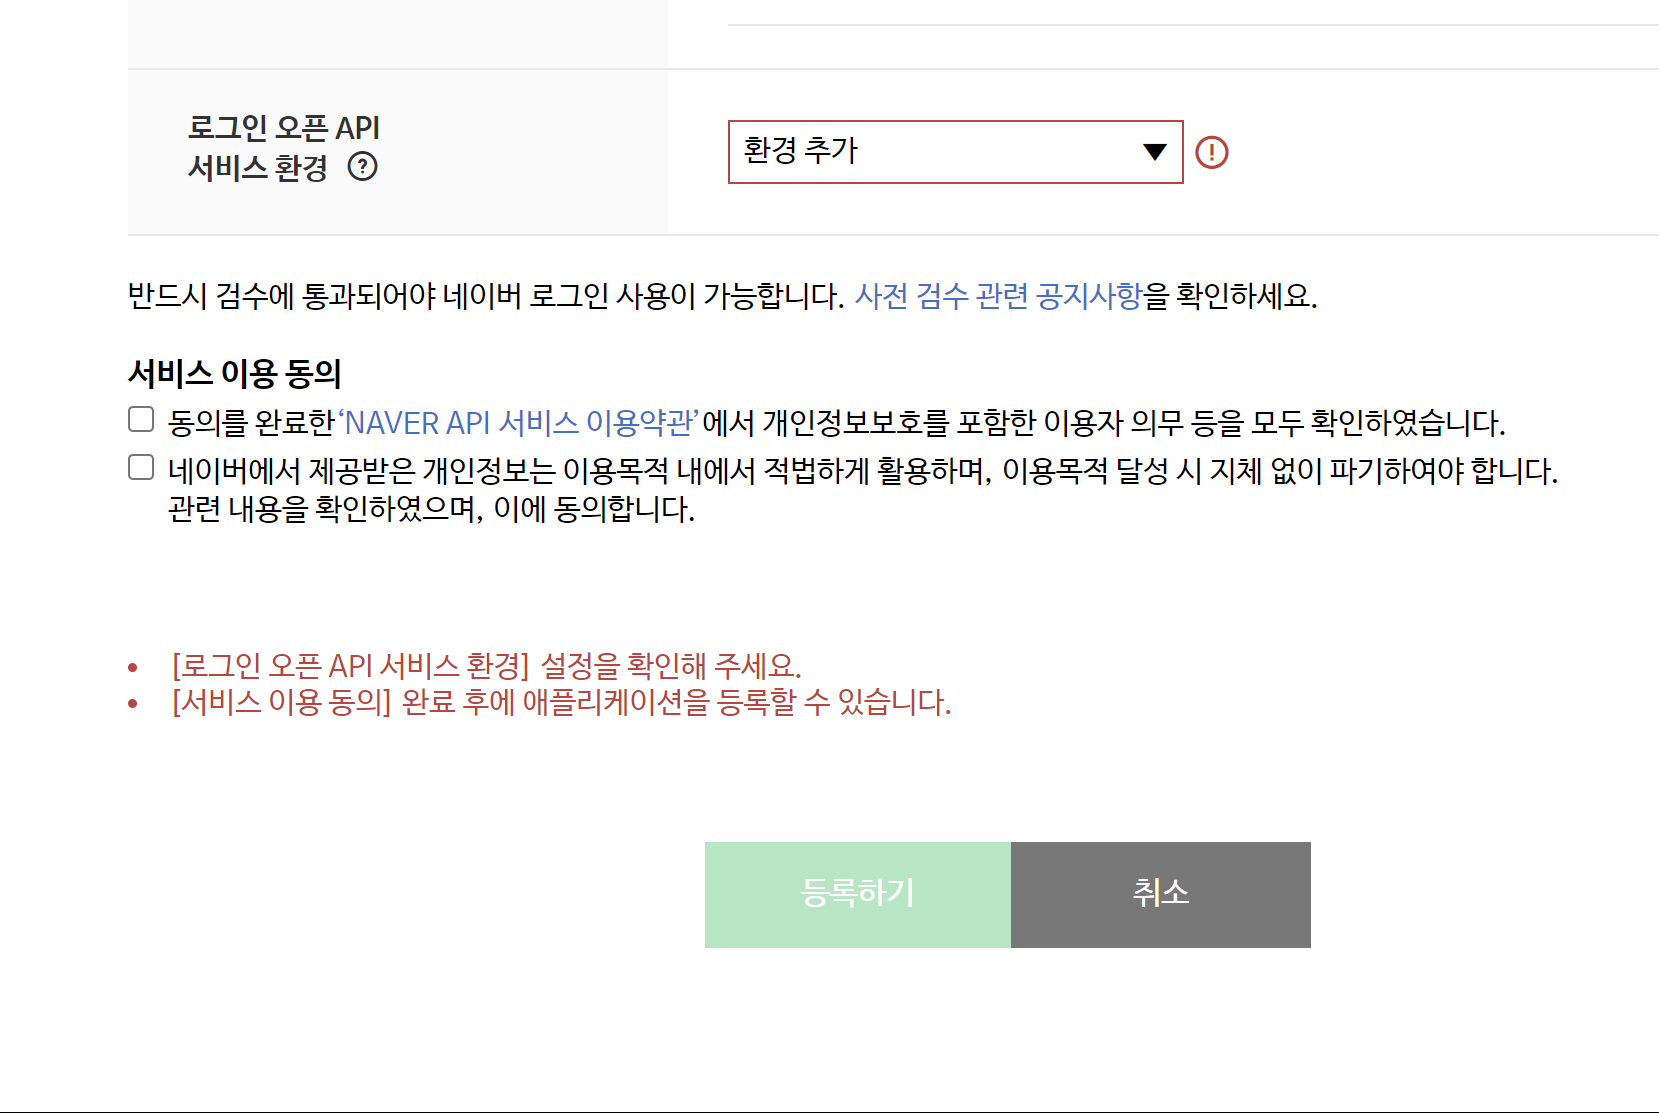
그 다음 아래 화면처럼 '로그인 오픈 API 서비스 환경'에서 '안드로이드'를 설정해주고, '다운로드 URL'에는 아무런 링크나 임시로 등록해주면 된다. (나중에 플레이 스토어등에 배포할때 해당 URL로 바꿔주면 됨, 글쓴이는 naver 링크로 달아둘게)
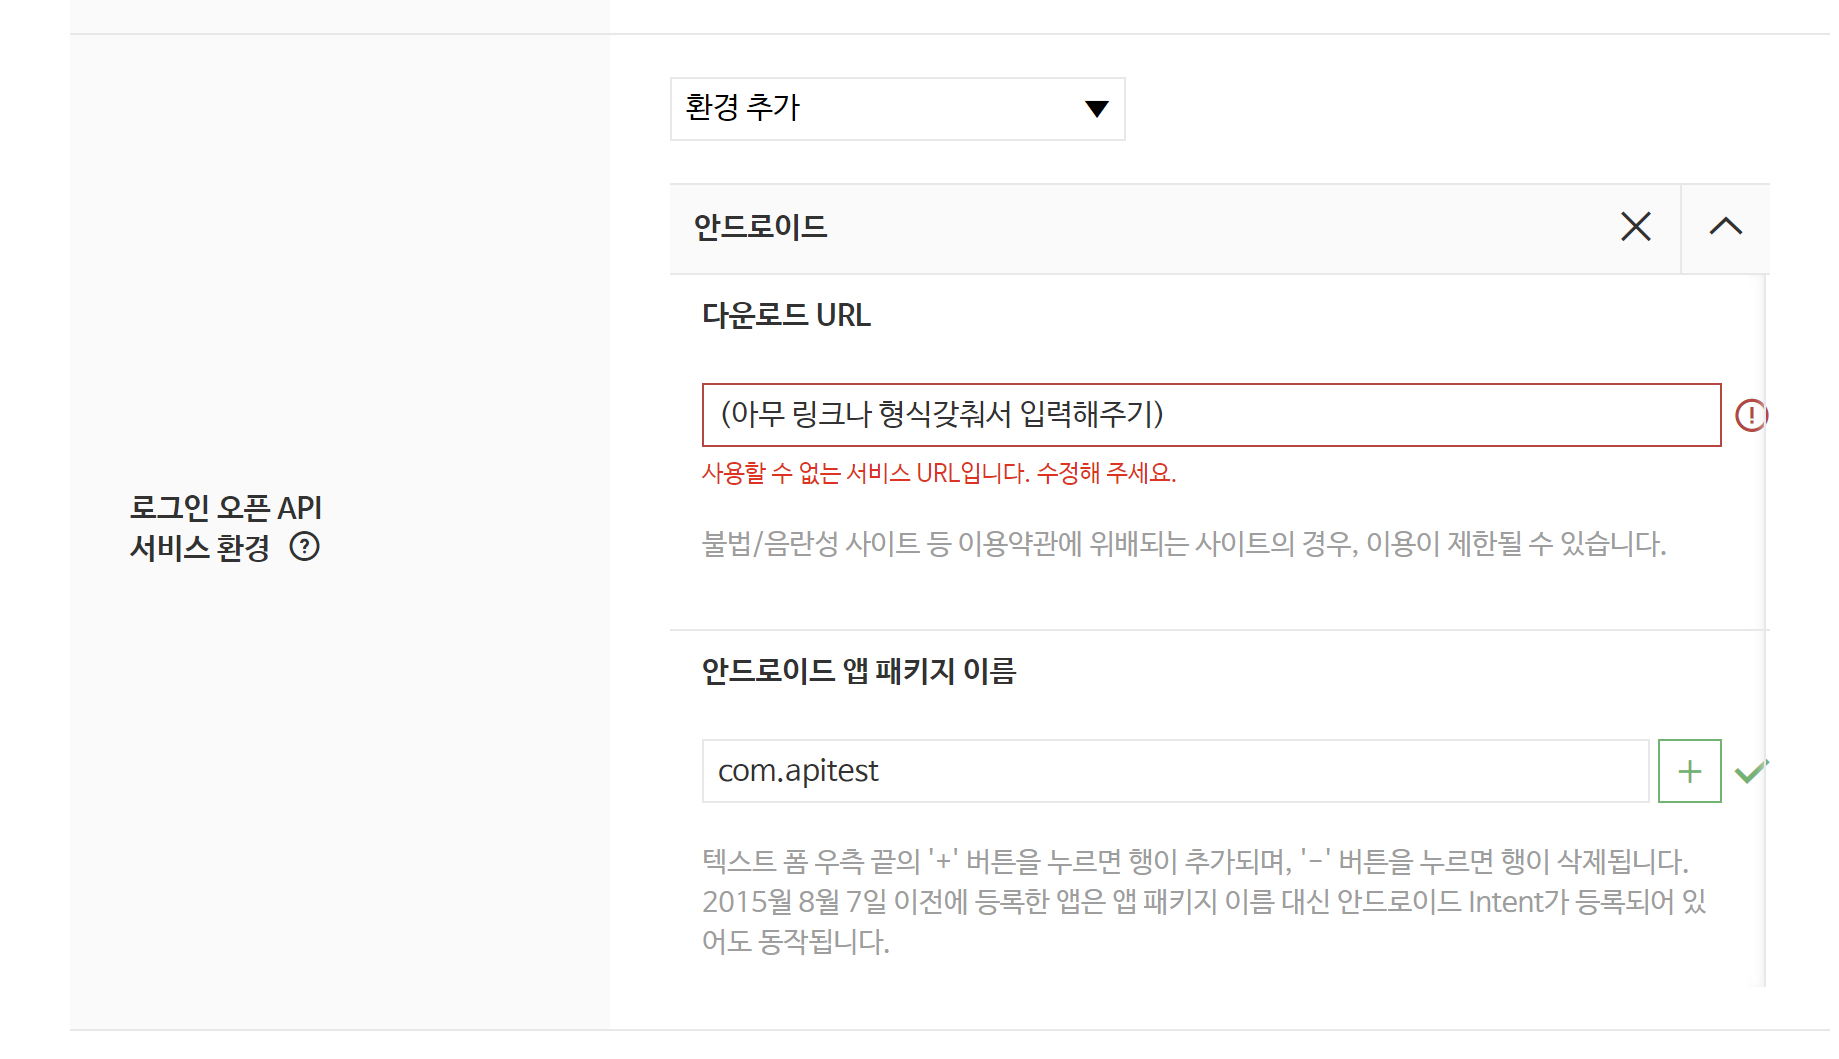
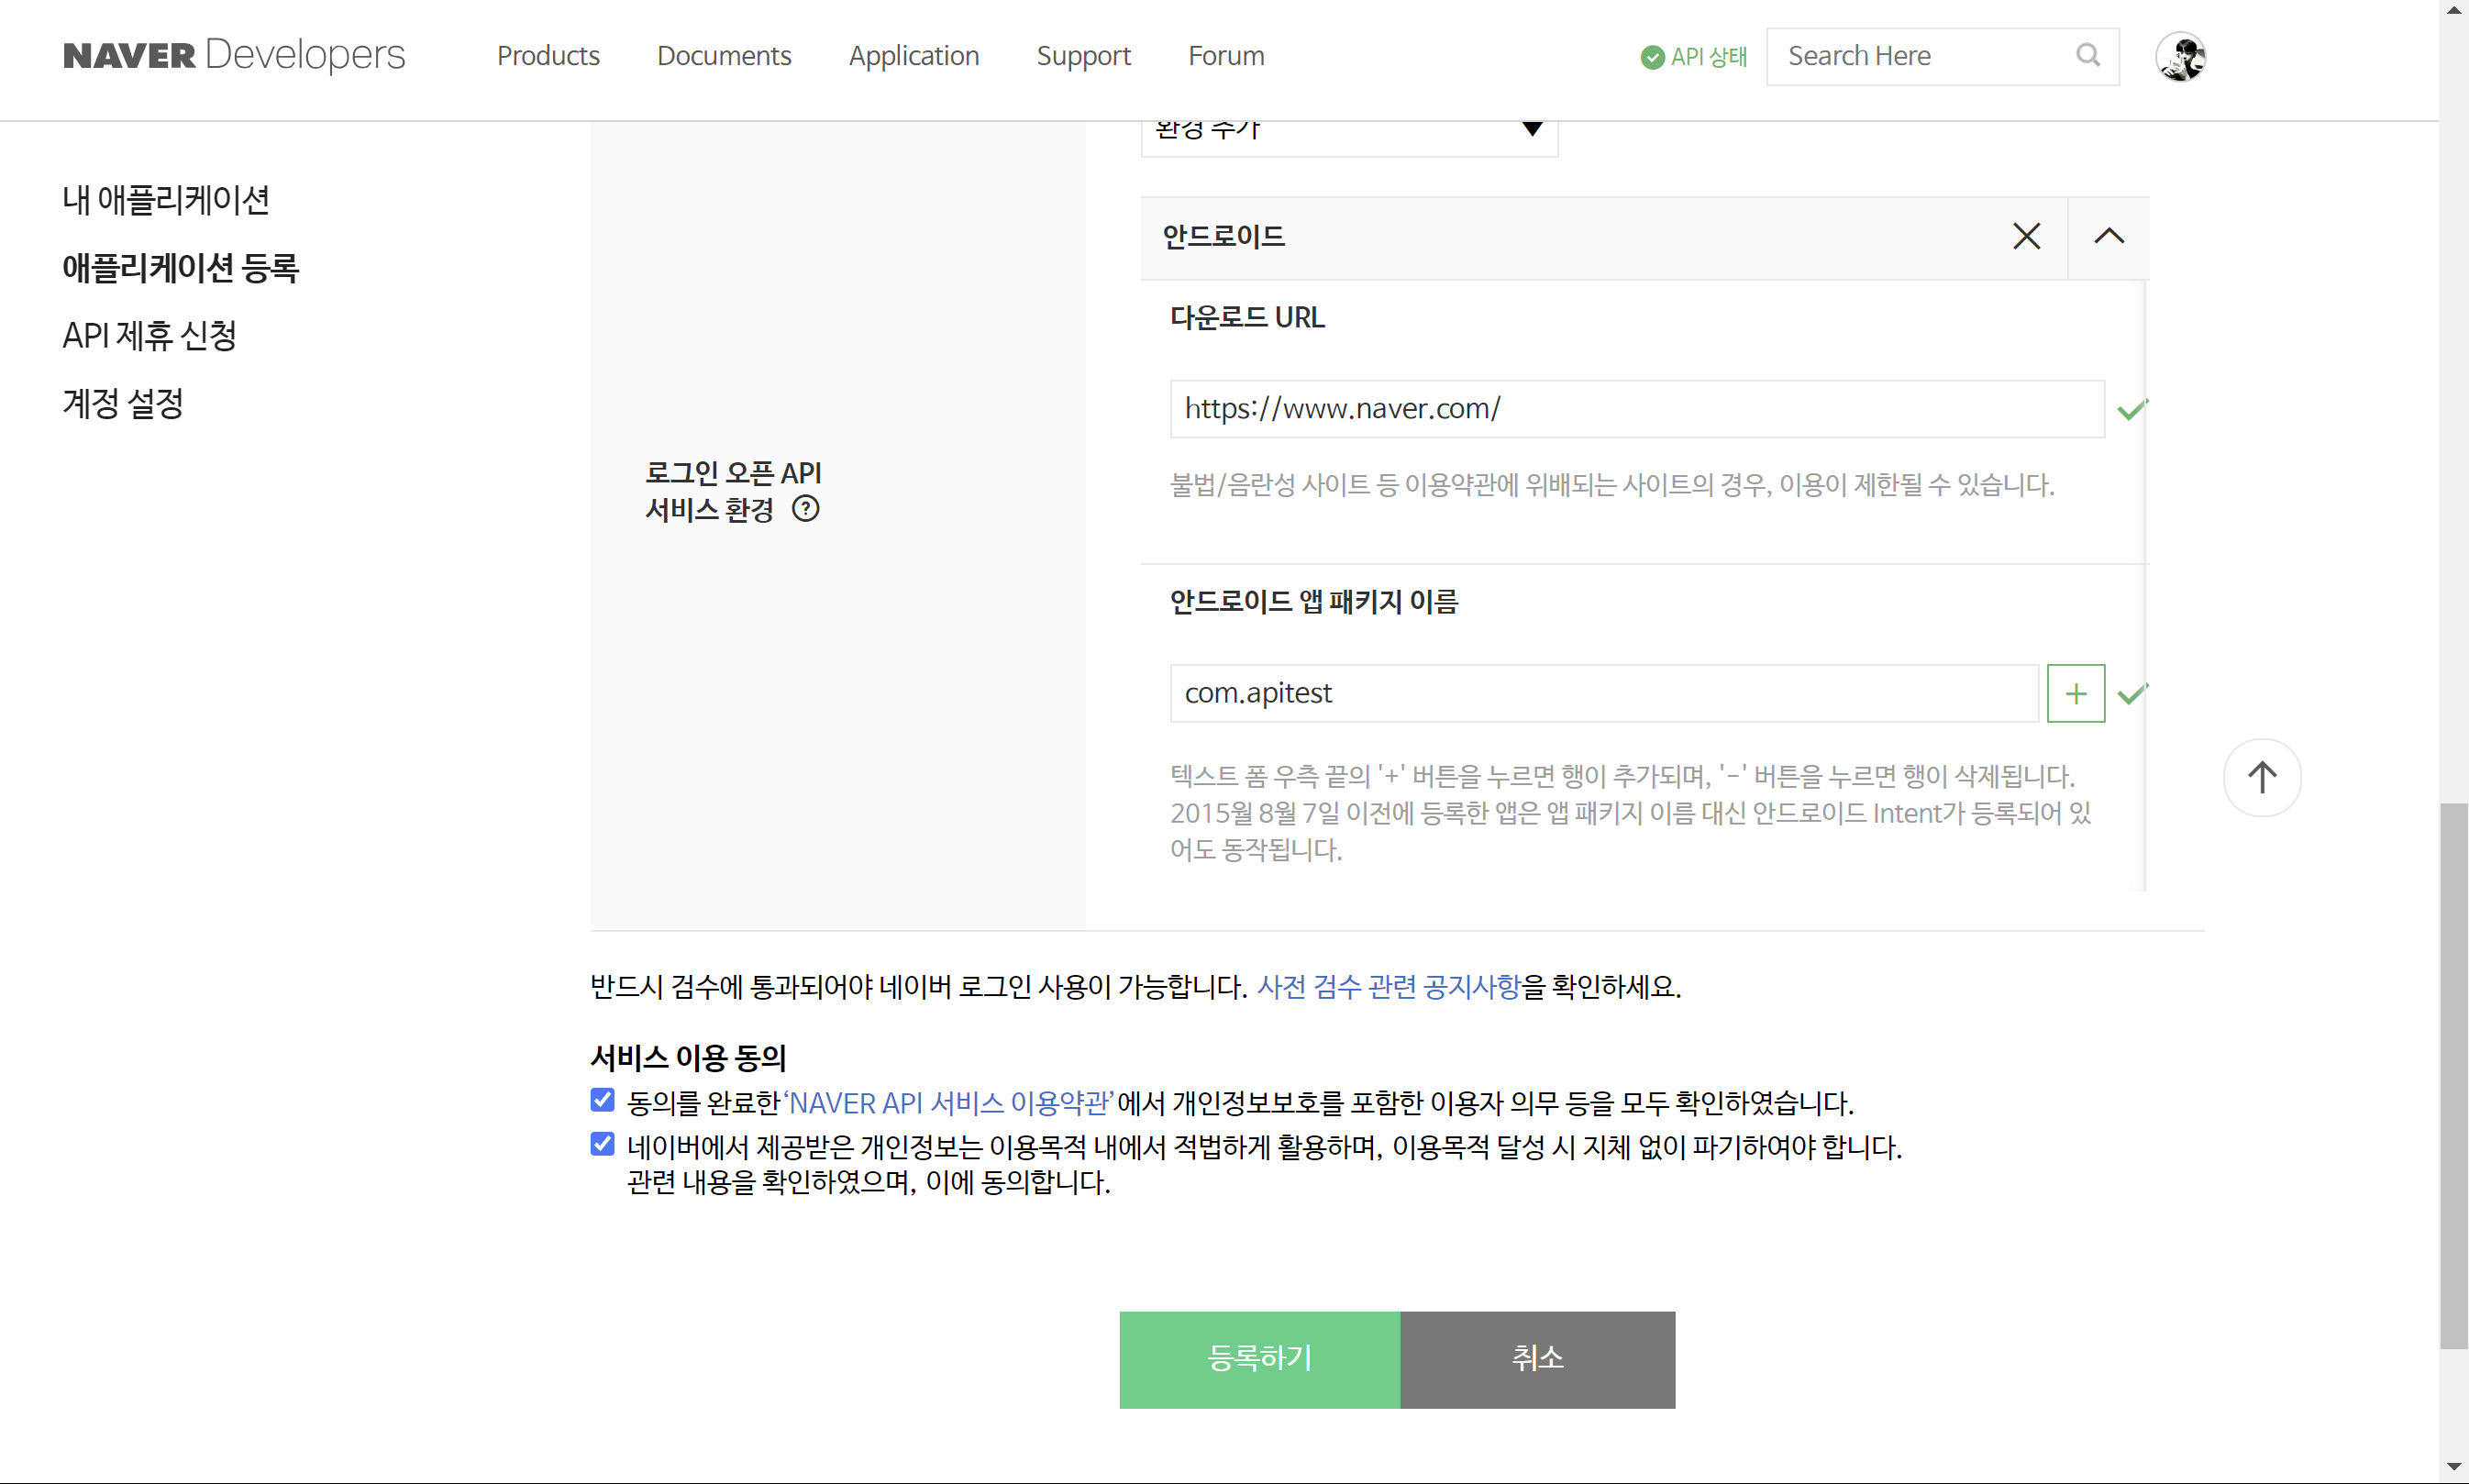
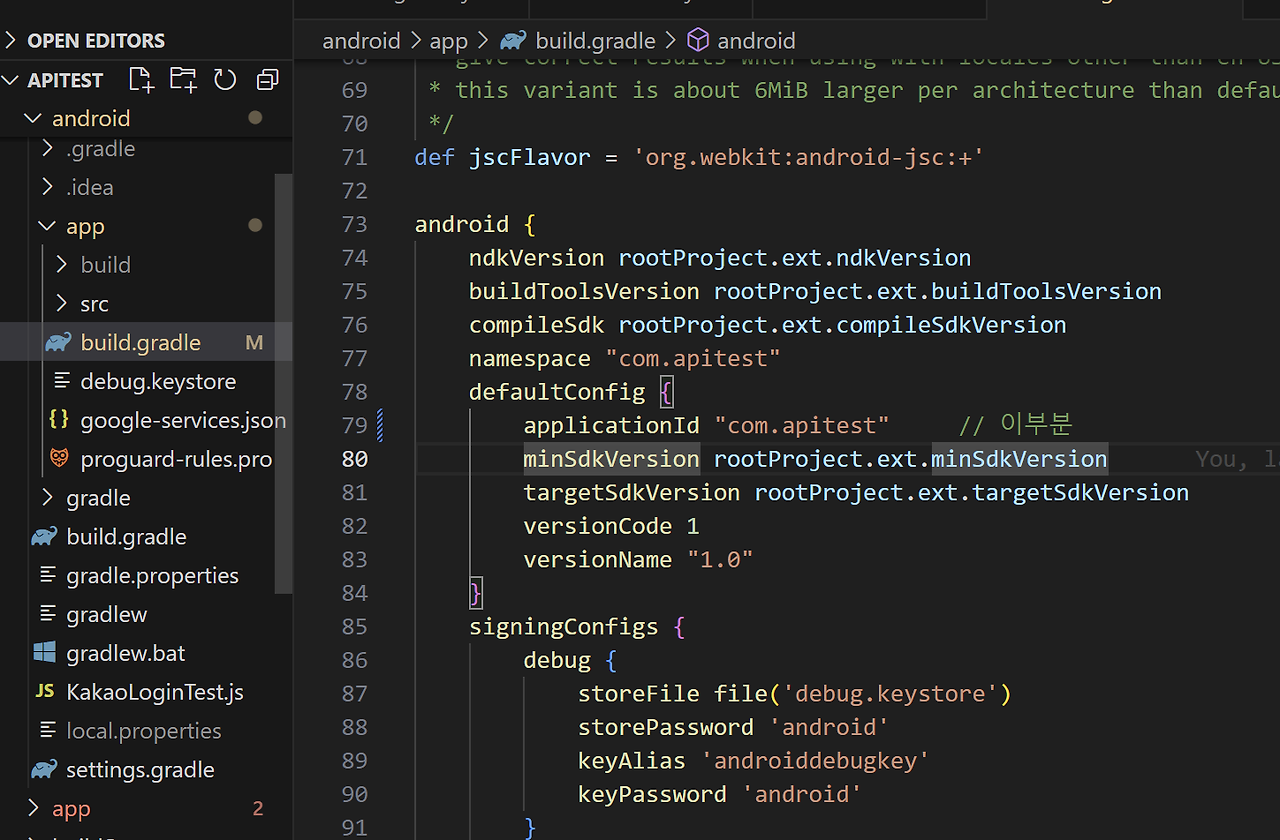
패키지명은 카카오 로그인 api를 연동시킬 때와 마찬가지로 현재 진행중인 프로젝트의 'APP'단의 'build.gradle'파일에 들어가 'applicationId'란의 'com. ' 으로 시작하는 부분을 복붙해주면 된다. (안드로이드 기준)
2. Naver Login API 라이브러리 설치
패키지명까지 모두 입력해주었다면 안드로이드는 다른 로그인 api들처럼 'build.gradle'파일이나 'AndroidManifest.xml' 파일등에서 API KEY나 권한, Maven 저장소, Rediect URL등등을 따로 설정해주지 않아도 되므로 네아로 라이브러리를 아래 코드를 통해 다운로드받아 TypeScript로 작성된 샘플 코드를 작성해주면 된다. ( 네아로 깃헙 공식 문서에 플러터와 타입스크립트 언어만 지원하기에 해당언어의 샘플코드만 존재함)
npm install @react-native-seoul/naver-login
3. TypeScript로 작성한 네아로 샘플 코드
import { Button, SafeAreaView, ScrollView, Text, View } from 'react-native';
import type {
  GetProfileResponse,
  NaverLoginResponse,
} from '@react-native-seoul/naver-login';
import NaverLogin from '@react-native-seoul/naver-login';
import React, { type ReactElement, useEffect, useState } from 'react';

const Gap = (): ReactElement => <View style={{ marginTop: 24 }} />;
const ResponseJsonText = ({
  json = {},
  name,
}: {
  json?: object;
  name: string;
}): ReactElement => (
  <View
    style={{
      padding: 12,
      borderRadius: 16,
      borderWidth: 1,
      backgroundColor: '#242c3d',
    }}
  >
    <Text style={{ fontSize: 20, fontWeight: 'bold', color: 'white' }}>
      {name}
    </Text>
    <Text style={{ color: 'white', fontSize: 13, lineHeight: 20 }}>
      {JSON.stringify(json, null, 4)}
    </Text>
  </View>
);

/** 발급받은 key값 입력해주기 */
const consumerKey = '';
const consumerSecret = '';
const appName = 'testapp';

/** 예시 */
const consumerKey = '18XLfToQbYAywdZuhuNz';
const consumerSecret = 'k0C3kCR9Mw';
const appName = 'testapp';

const serviceUrlScheme = 'navertest';

const NaverAPIScreen = (): ReactElement => {
  useEffect(() => {
    NaverLogin.initialize({
      appName,
      consumerKey,
      consumerSecret,
      serviceUrlSchemeIOS: serviceUrlScheme,
      disableNaverAppAuthIOS: true,
    });
  }, []);

  const [success, setSuccessResponse] =
    useState<NaverLoginResponse['successResponse']>();

  const [failure, setFailureResponse] =
    useState<NaverLoginResponse['failureResponse']>();
  const [getProfileRes, setGetProfileRes] = useState<GetProfileResponse>();

  const login = async (): Promise<void> => {
    const { failureResponse, successResponse } = await NaverLogin.login();
    setSuccessResponse(successResponse);
    setFailureResponse(failureResponse);
  };

  const logout = async (): Promise<void> => {
    try {
      await NaverLogin.logout();
      setSuccessResponse(undefined);
      setFailureResponse(undefined);
      setGetProfileRes(undefined);
    } catch (e) {
      console.error(e);
    }
  };

  const getProfile = async (): Promise<void> => {
    try {
      const profileResult = await NaverLogin.getProfile(success!.accessToken);
      setGetProfileRes(profileResult);
    } catch (e) {
      setGetProfileRes(undefined);
    }
  };

  const deleteToken = async (): Promise<void> => {
    try {
      await NaverLogin.deleteToken();
      setSuccessResponse(undefined);
      setFailureResponse(undefined);
      setGetProfileRes(undefined);
    } catch (e) {
      console.error(e);
    }
  };

  return (
    <SafeAreaView
      style={{ alignItems: 'center', justifyContent: 'center', flex: 1 }}
    >
      <ScrollView
        style={{ flex: 1 }}
        contentContainerStyle={{ flexGrow: 1, padding: 24 }}
      >
        <Button title={'Login'} onPress={login} />
        <Gap />
        <Button title={'Logout'} onPress={logout} />
        <Gap />
        {success ? (
          <>
            <Button title="Get Profile" onPress={getProfile} />
            <Gap />
          </>
        ) : null}
        {success ? (
          <View>
            <Button title="Delete Token" onPress={deleteToken} />
            <Gap />
            <ResponseJsonText name={'Success'} json={success} />
          </View>
        ) : null}
        <Gap />
        {failure ? <ResponseJsonText name={'Failure'} json={failure} /> : null}
        <Gap />
        {getProfileRes ? (
          <ResponseJsonText name={'GetProfile'} json={getProfileRes} />
        ) : null}
      </ScrollView>
    </SafeAreaView>
  );
};

export default NaverAPIScreen;
(위의 코드는 네아로 깃헙 공식문서에서 'example' 파일에 있는 'APP.tsx'파일안에 있는 샘플파일을 가져온 것이므로 자세한 내용은 아래 깃헙 공식문서를 참고)
https://github.com/crossplatformkorea/react-native-naver-login
GitHub - crossplatformkorea/react-native-naver-login: 리엑트 네이티브 네이버 로그인 라이브러리
리엑트 네이티브 네이버 로그인 라이브러리. Contribute to crossplatformkorea/react-native-naver-login development by creating an account on GitHub.
github.com
실제 모바일 기기에서 실행해본 테스트 영상
'프로그래밍 언어 > React Native (RN)' 카테고리의 다른 글
| React Native에서 카카오 로그인 API 연동시키기 (RN) (0) | 2024.08.12 |
|---|---|
| Firebase를 활용해 구글 로그인 API 연동하기 (RN) (0) | 2024.08.09 |
| React Native Google Map API 회색배경 렌더링 오류 (0) | 2024.08.07 |
| React Native에서 Google Map API 사용하기 (0) | 2024.08.07 |
| multipart/form-data 형태로 JSON 데이터와 이미지 파일 서버에 같이 보내기 (1) | 2024.07.29 |